MadArtBot: Birth of a 3-D Printer – Part 3

My darling,
I write to you from the battlefield that is my living room. Parts are strewn hither and yon like the detritus from a child’s willful rampage through a toy chest. I do not know how much longer my urge to clean will hold, but my resolve is as strong as I can make it and is bolstered, as always, by my thoughts of you and what a clean home might look like once again. I yearn to see my floor again.
Mr. Lincoln, inventor of the eponymous log toy and sedan automobile, assures me that, like a determined 4th grader playing with those aforementioned logs, I can make it through this ordeal and create this three-dimensional printing robot and stop being a baby. But, he warns, there will be much melted plastic to wade through before the end of that journey is reached. Also, there will be cut fingers, scraped knees and small burn marks on the back of ones hand. But first, he quickly reminds, an extruder must be built and tweaked, much like some other analogy that escapes me at the moment. So I will close.
All my love,
M. A. Bot
 1-2-3 Extrude!
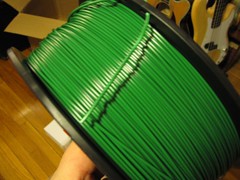
As promised last time, today we’re going to talk about extruding. Which sounds naughty, but it’s not. So what, exactly, is this extruder thing. Well, in order to print an object, you need a medium which can be extruded, sprayed, spread, etc. into layers, slowly building a solid object. In the case of our, and most, 3-D printer that medium is ABS plastic or PLA (and sometimes HDPE) extruded through a hot stepper-controlled nozzle. This comes on a roll (see pic on left) in the form of a single long strand of filament which is fed into the extruder by a stepper motor at a generally constant (but adjustable) speed. These materials were chosen for having a relatively low melting point but maintaining enough rigidity to build a 3-dimensional object:
* ABS will extrude above approximately 180° C, and will adhere to itself at around 240°C and is very rigid upon cooling. Lots of things you own are made of or contain ABS plastic. This is what we’ll be working with as the objects we plan to make are meant to last. Down the road, maybe we’ll try some PLA printing and… maybe even a Froststruder, which is exactly what you think it is; an extruder for frosting!
* PLA can extrude and adhere to itself at around 180°C and is fairly rigid, but also water soluble on cooling. PLA is considered more environmentally friendly, but obviously it will degrade over time, especially in the presence of moisture.
* HDPE is the stuff your average milk jug is made from. I don’t have any direct experience with it, but it’s worth mentioning as some Makers (that’s what many people in the ‘maker’ movement call themselves) do use it in their 3-D printers. Its rigidity, I’m told, depends on the size of the object. Small HDPE prints are fine, but larger ones can be fidgety due to warping and bending.
OK, so let’s get on with building our extruder. We’ll start with some parts: a heater element, a block and nozzle, a stepper motor, a filament feeder thingy, a fan and heatsink to keep the stepper cool-ish, a temperature sensor (thermistor) and a thermocouple, Kapton tape, ceramic insulation and other assorted doodads. We’ll also be wiring some of this to a thermal cutoff circuit whose job it is to make sure we don’t overheat and ruin our extruder.


(Parts, parts, parts and a thermal shutoff board)
Hark! A diagram!
 (click to enlarge) As you can see from the diagram on the left, the basic idea is pretty simple. And the mk7 version is a simplified, smaller version of the elaborate mk6. Filament is fed into a drive block containing a toothed gear driven by a stepper motor (for fine control – a stepper, like a servo [and forgive me if I ever say servo when I mean stepper], motor knows how far its moved at all times). That filament travels through the block, which is kept cool by a heat sink and fan due to its proximity to the hot end, and into the heating block and nozzle. The heating element in the heater block is kept in check by both a thermistor and a thermocouple which are tied back into an shutoff board (for overheating) and the extruder controller (for maintaining the proper temperature). The heater block is wrapped in ceramic insulation and held in place with a high temperature polyamide tape (DuPont Kapton tape, to be precise. If it looks familiar somehow, Kapton foil and tape was used all over the Apollo lunar modules.). So. Simple, right? Absolutely. And simple is good. Let the computer and controller boards, which we’ll talk about next time, do the hard work.


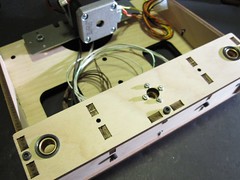
(Kapton tape, the hot end, the extruder mounted on the Z axis, another view of Z axis)
 So now that we’ve put all these pieces together, we have a printing head capable of extruding a fine stream of material. A controller board, tied to a microcontroller, moves the drive gear to advance filament, keeps the heater at the proper temperature and, hopefully, makes that the right amount of plastic comes out. This all is mounted to the Z axis which travels up and down on a stepper-controlled worm gear.
Next time we’ll look at the electronics that drive the stepper motors, extruder and interface with your computer. It’s custom boards, relays and Arduinos all the way down! Now, run home to your beloved before them Yankee soldiers find you a’hidin’ out in that barn!

