I am not the first to recognize that Jedi are basically space wizards. I am not even the first to mash together Harry Potter and Star wars. I am, to my knowledge, the first obsessively produce scaled up versions of the prop wands from the Harry Potter movies in aluminum as hilts for lightsabers.
Here’s the whole process in excruciating detail:
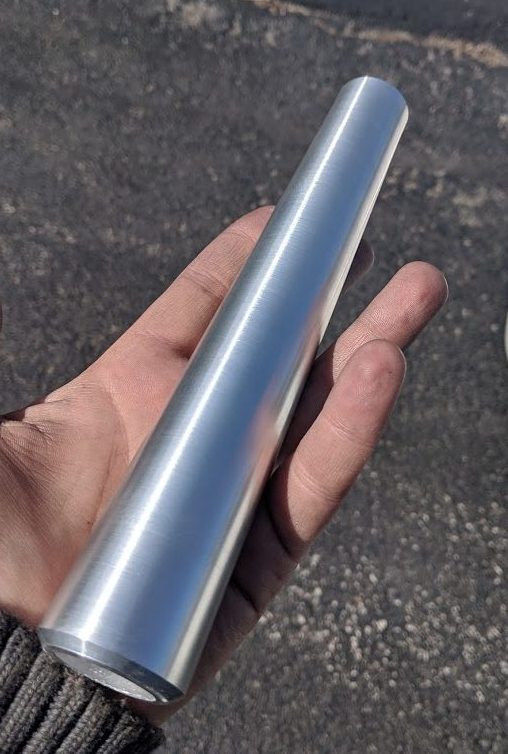
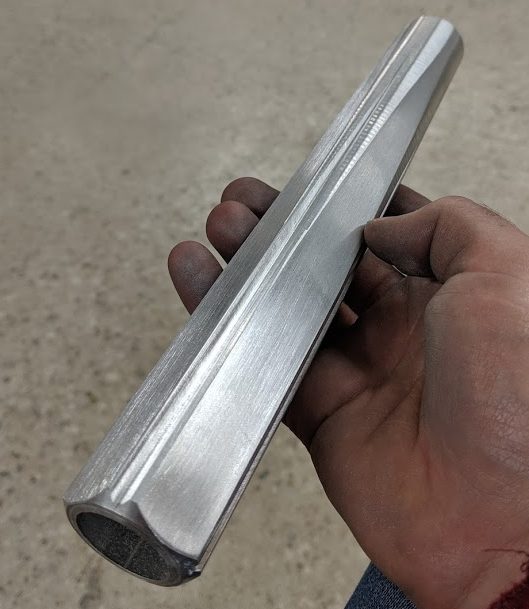
The base of the wands all start from the same aluminum tube: 1″ inner diameter, 1.5″ outer diameter. I turned that down on a lathe to get a gentle taper from the full 1.5″ OD to 1.2″ over the length of the tube (8-9″).
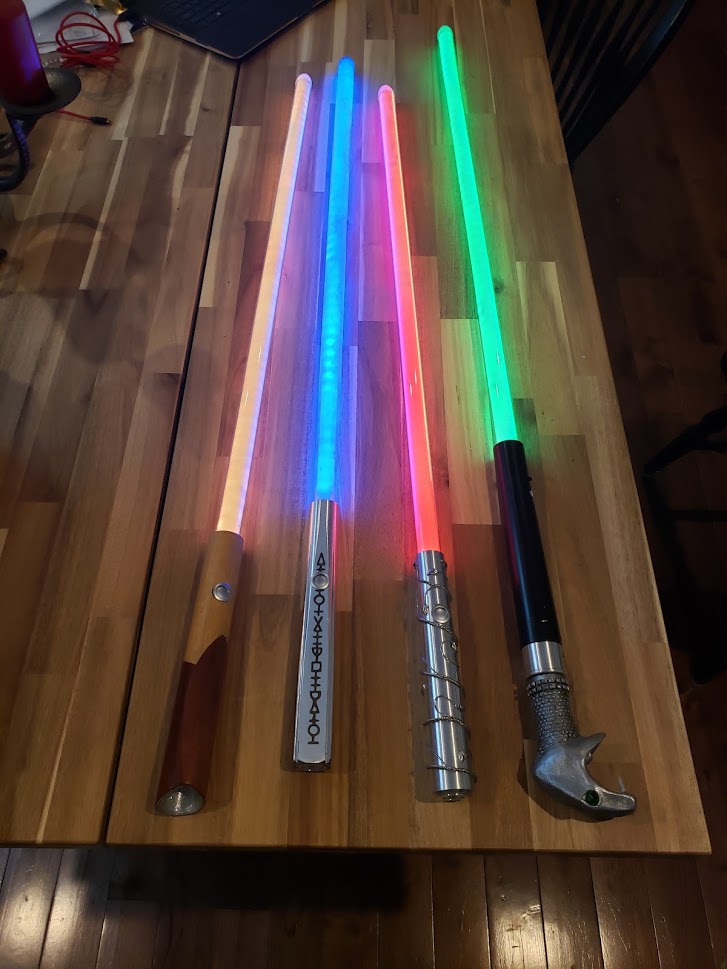
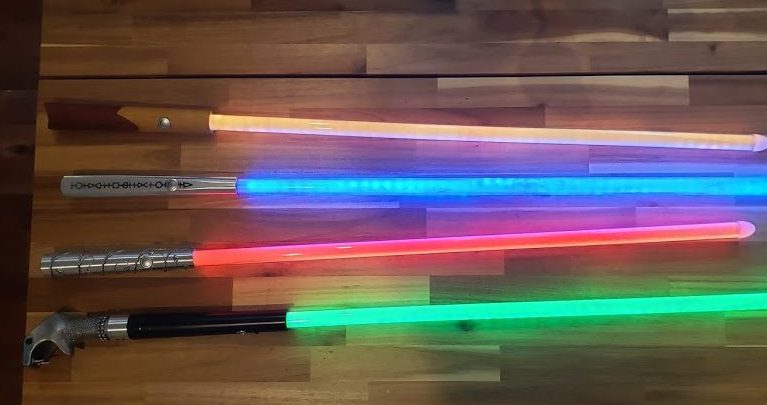
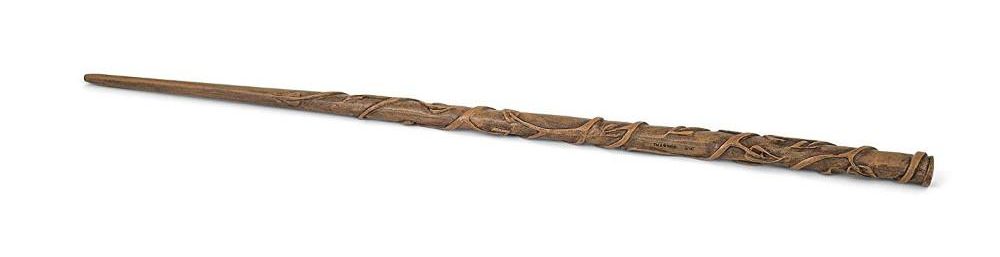
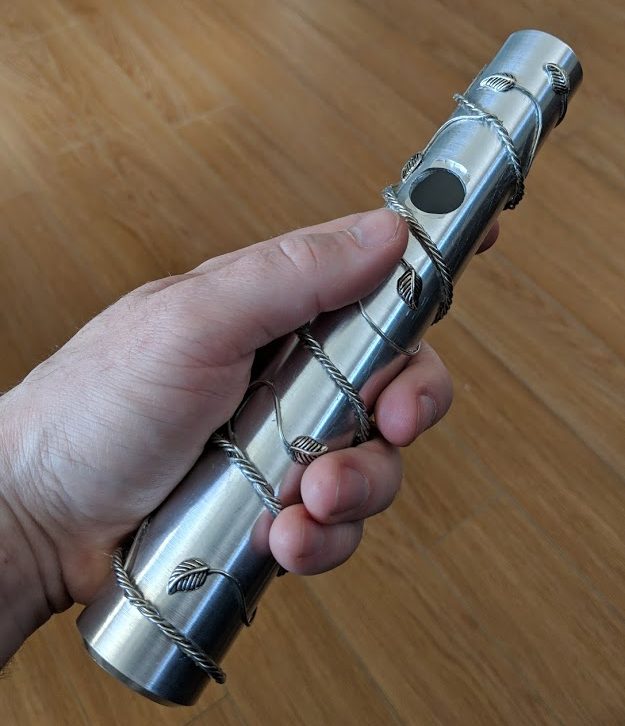
The first wandsaber to complete was base off of Hermione Granger’s wand. Her wand from the films has lovely vines and leaves winding their way up the hilt. I used coiled wire, off-the-shelf necklace charm leaves, and E6000 glue to apply the vines.
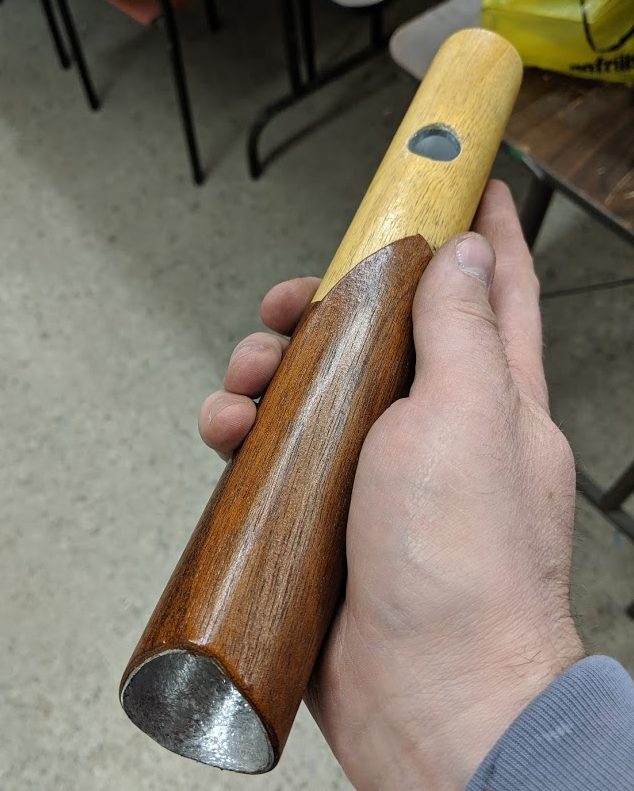
Next up was one based on News Scamander’s wand from the Fantastic Beasts series of movies. It was the easiest to make. Again I started with a tapered aluminum base, and just wrapped two different kinds of wood veneer around it.
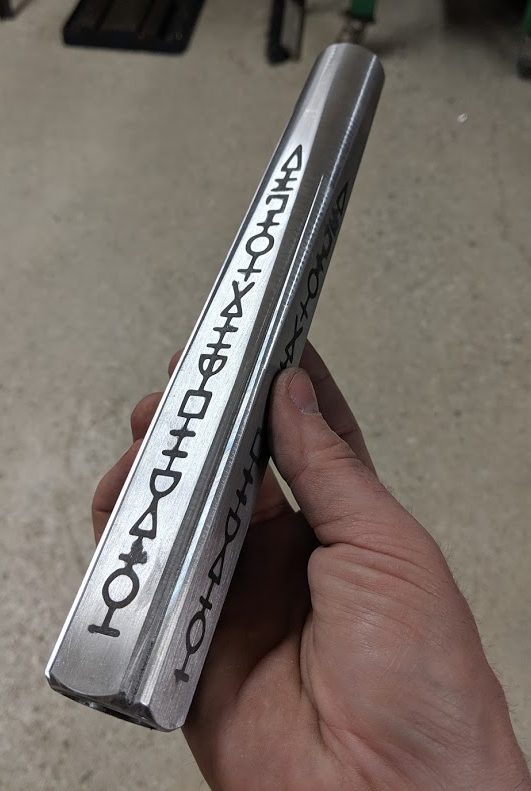
Sirius Black’s wand presented a new challenge: it’s not round. Sirius’s wand has a square base with runes etched into it. I still started with the same aluminum tube, but I machined 3/16″ off four sides before putting it in the lathe to taper the end.
I etched in the runes by masking the aluminum with sticky-backed vinyl and using ferric chloride as an etchant. As a note: ferric chloride, commonly used to etch circuit boards, is toxic and far too aggressive for aluminum. I would recommend finding something else.
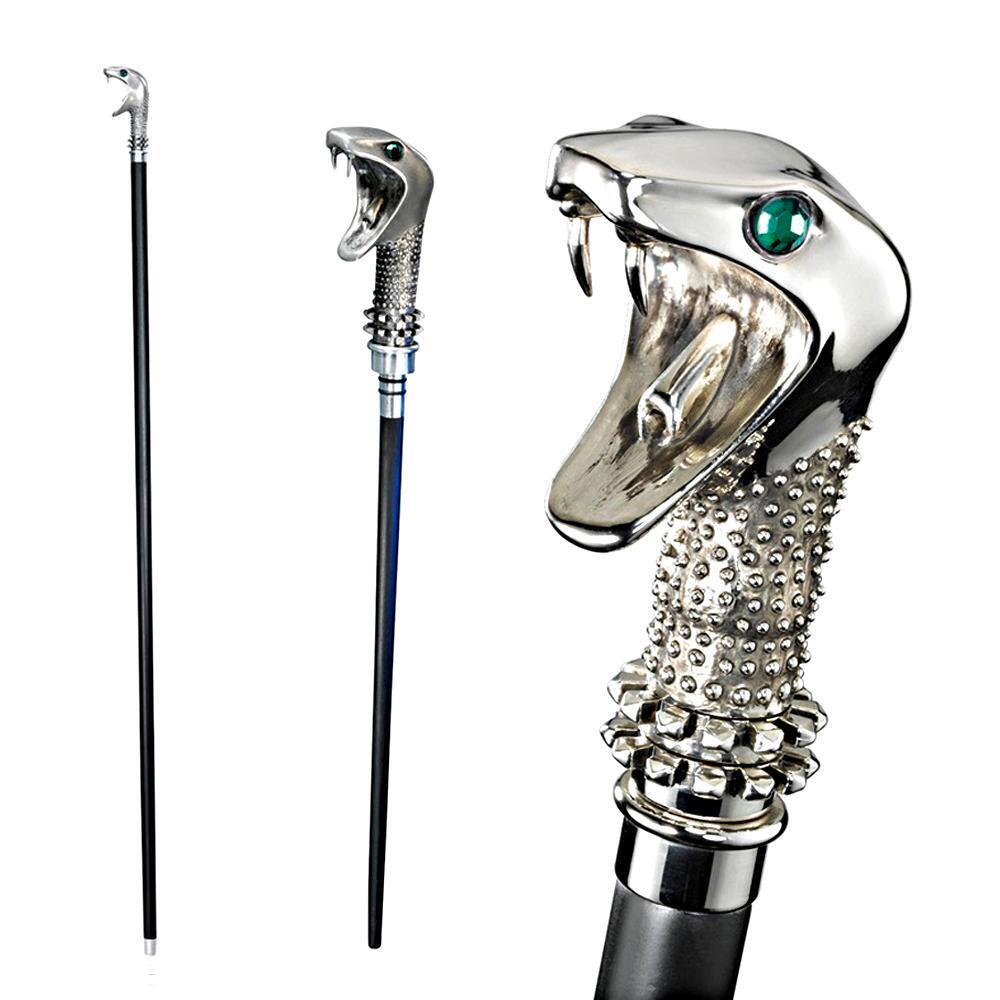
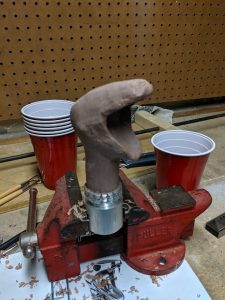
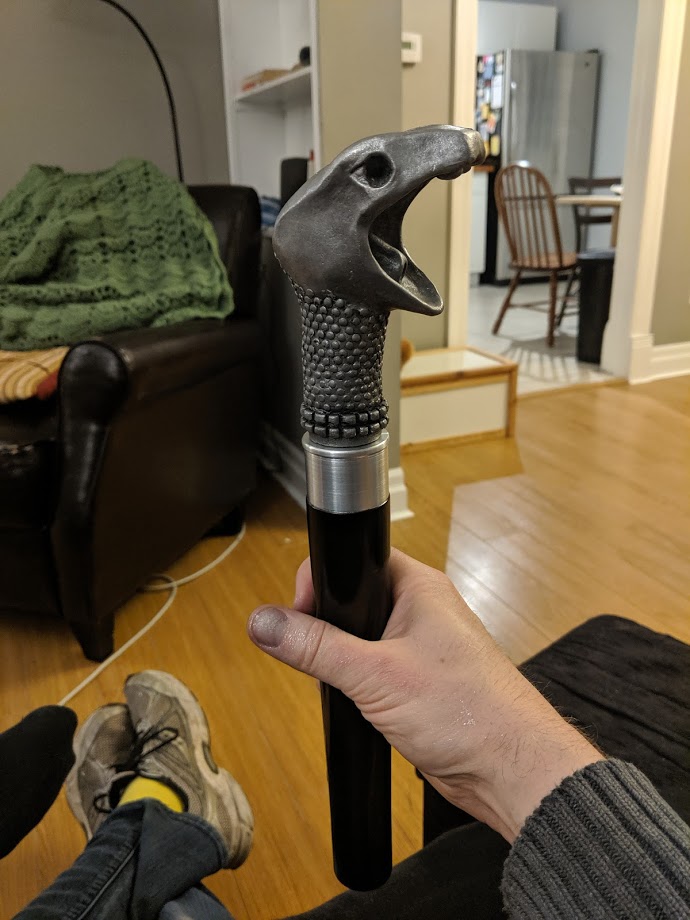
The final wandsaber was for my fellow cosplay obsessee and MAL Writer, Emily (@Seelix pretty much everywhere that matters). She wasn’t satisfied with some mundane wandsaber like the rest of us muggles. She wanted Lucius Malfoy’s walking stick wand.
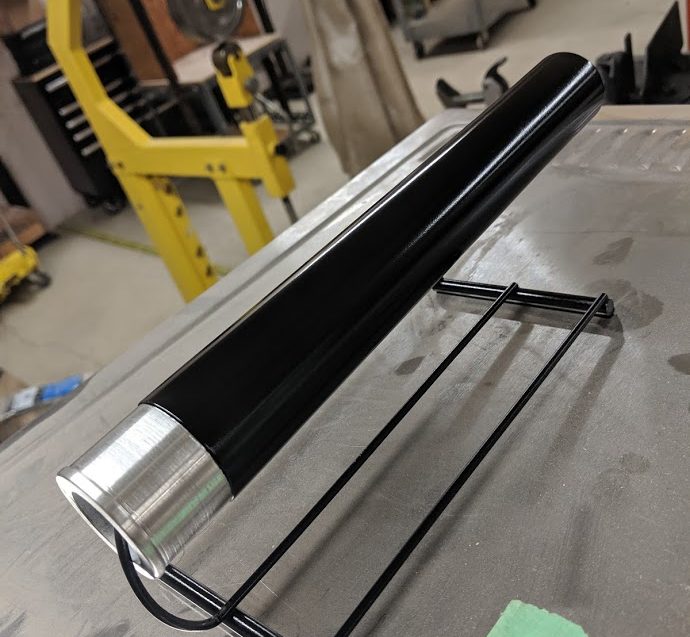
So the grip was pretty easy. Tapered aluminum base, painted with a tough spray enamel paint.
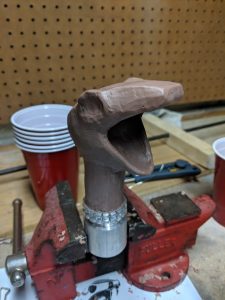
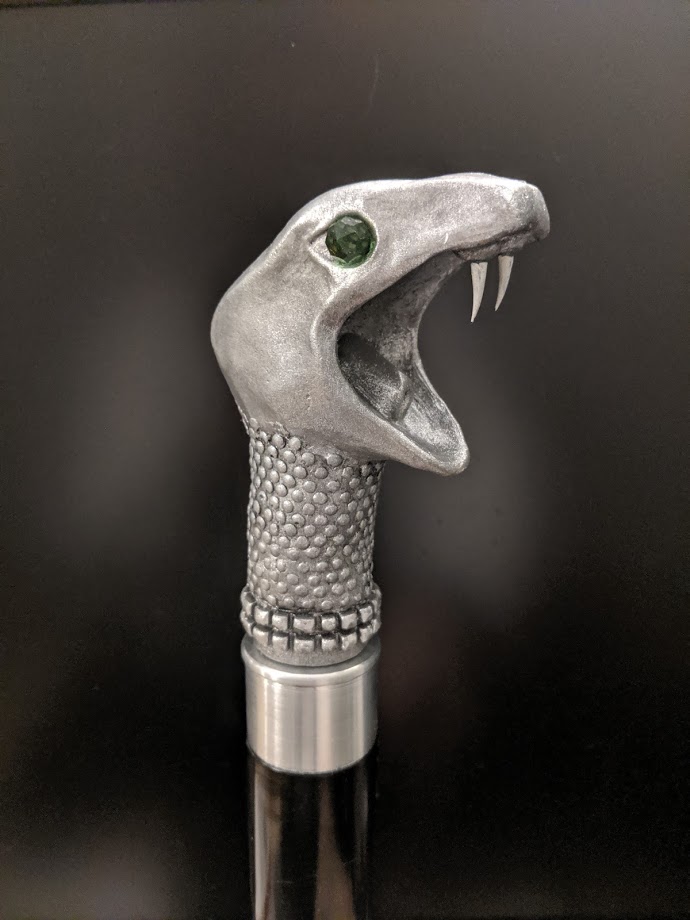
But that snake head… that took some doing. I decided to cast it in pewter because it would look the best, and I make poor life choices. I started by machining the base of the neck out of aluminum, and then sculpting the head in Monster Clay.
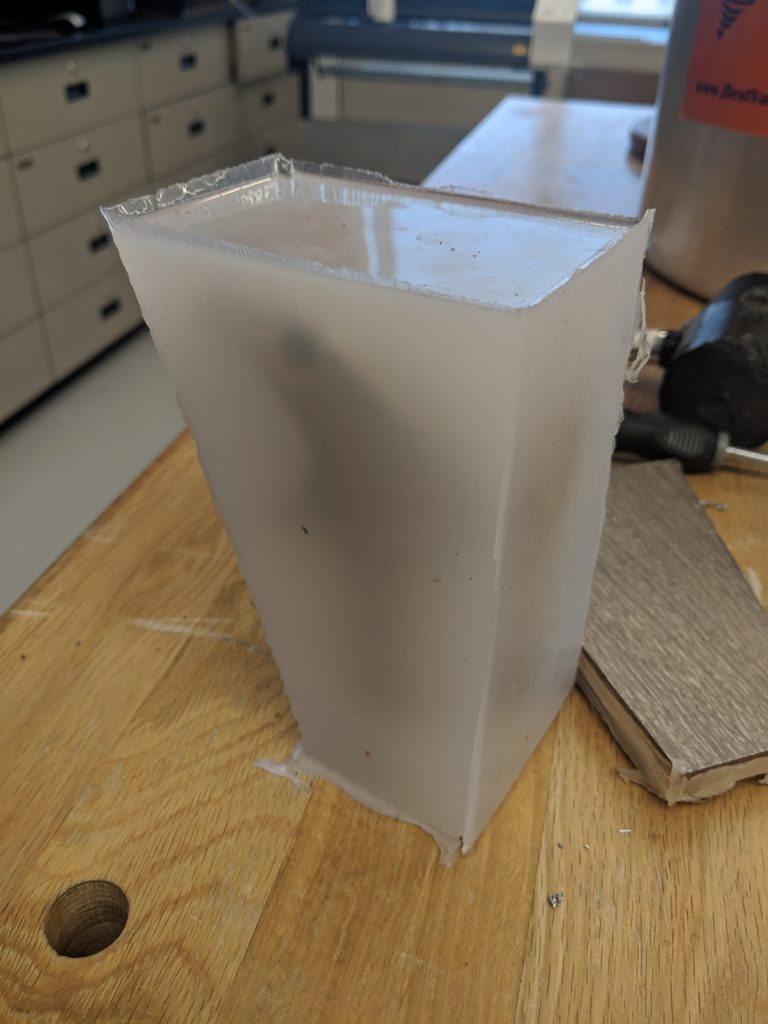
I used Dragon Skin 30 to make the mold into which I would pout the pewter. I was worried about bubbles because of the undercuts and small details in the sculpt, but I was lucky enough to have someone willing to loan me a vacuum chamber to degas the mold while it cured.
The mold was all I could hope for: clean, bubble-free, and it held its shape well. I made a single piece mold, which is usually a bad idea, but I knew that I could slice open the back and pull the snake head out that way, thus having fewer parting lines.
I poured a the pewter and it was beautiful… it was also around five pounds and $70 worth of pewter… New plan

I picked up some Smooth-Cast 325 and aluminum powder. Not cheap either, but much less per pound than pewter, and certainly less dense.
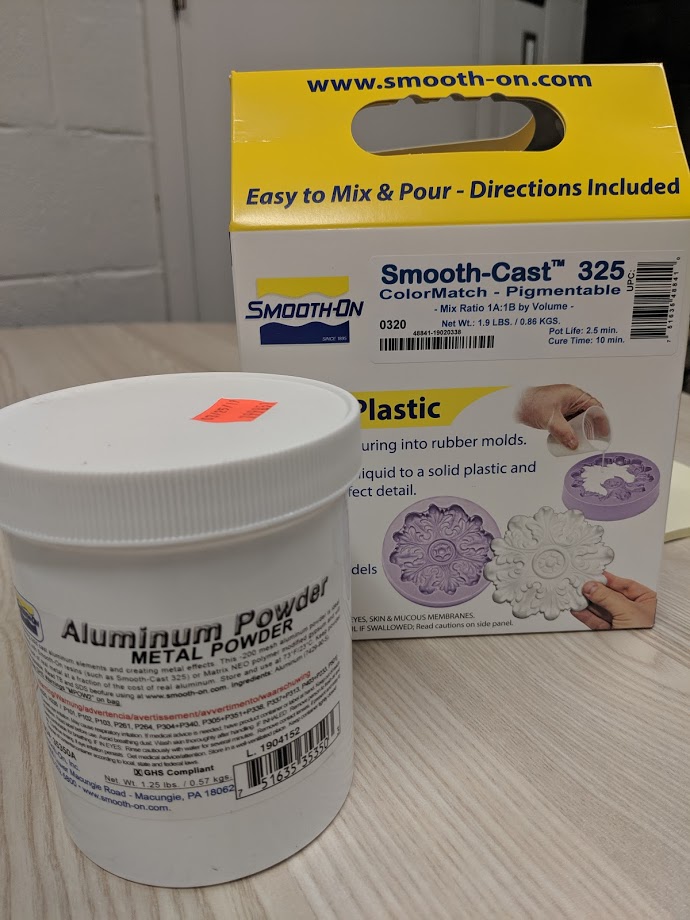
The raw case came out pretty well: Much lighter, not too many bubbles, and quite solid.
The final version, buffed and painted, with cut glass eyes and plastic fangs makes me very happy. Totally worth the irresponsible amount of time I spent on it.
I only made the hilts. Once they were done, I shipped them off to Topher, one of the old writers from our sister site, Grounded Parents. He did all the blades and electronics and has been kind enough to write a post for us about that process.
Here’s a bit of a spoiler: