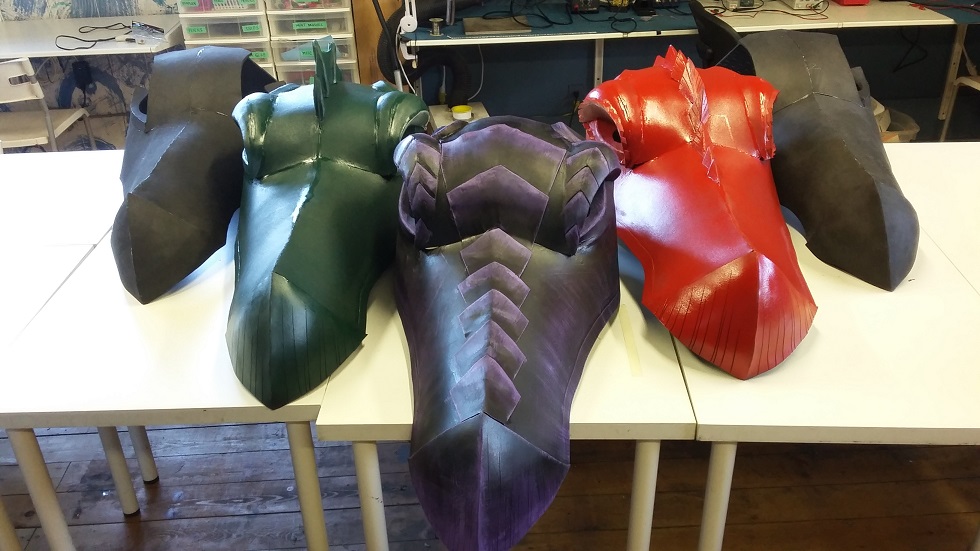
I’ve been working for the past few months on a project for my local little theater company. They’re putting on a production in the summer that has some rather ambitious requirements for props including a whole panoply of monsters. The first portion of the project included building five unique and combat-ready dragon heads. Below are the instructions I wish I’d had when I started and a pattern for your own giant dragon head if you want it.
The Pattern
If you just want to use my pattern, you can find a pdf of it here. Download it and skip to assembly. If you want to start from scratch read on from here.
Start by carving out a base form from insulation foam. The pink or blue stuff works well but can be expensive. Styrofoam tends to fall apart and leave little balls everywhere but it’s cheap. You only need to make half of the head as long as it’s going to be symmetrical. Spray-on contact cement works well to glue it together, but make sure to test it on a small piece first. Some glues will dissolve foam.
An angle grinder with a flap disk works well to do most of the rough shaping. Once it is close to your desired shape, use a rasp and Dremel tool for finer detail. Finally use a drywall sanding sponge to clean up the surface. It’s a really good idea to wear a dust mask for all of this. I’m not sure what this stuff will do inside your lungs but it probably isn’t good.

To make the pattern, covered the entire thing in duct tape. Draw lines along any peaks and valleys or sharp angles. Also, draw small marks crossing those lines every couple of inches. That will help you line up the parts properly later. Also, label each piece and number each side of each seam so you can remember how to put it back together at the end.
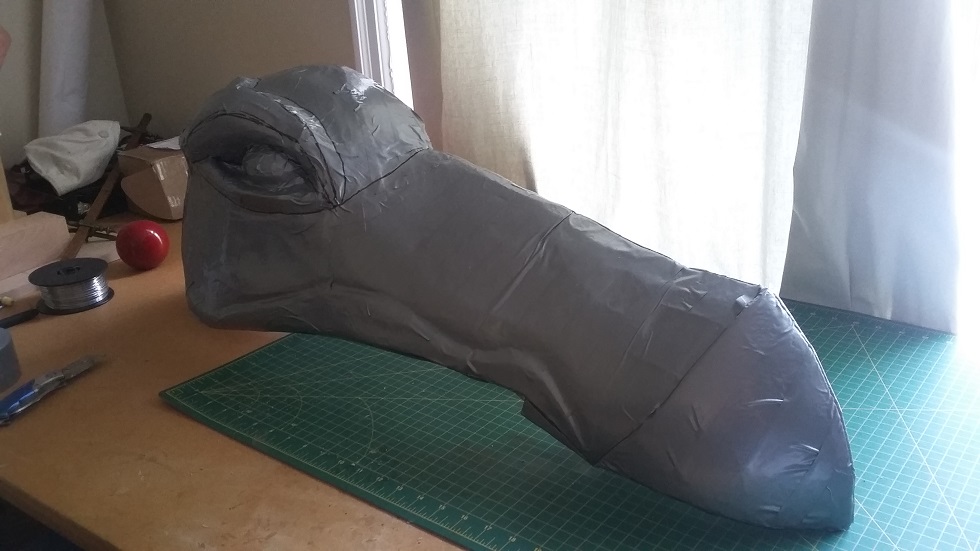
Cut the duct tape along your lines and peel it off carefully. Lay the pieces on paper (I used light bristol board). When laying them out, make sure that the edges are all flat and even. It doesn’t matter if the middle is a bit crumpled, that’s to be expected; you are laying a curved surface on a flat plane. Your edges are what matter right now. If you can’t get the edges to lay flat, cut that piece into smaller sections. Transfer all of the markings to the paper and cut it out.
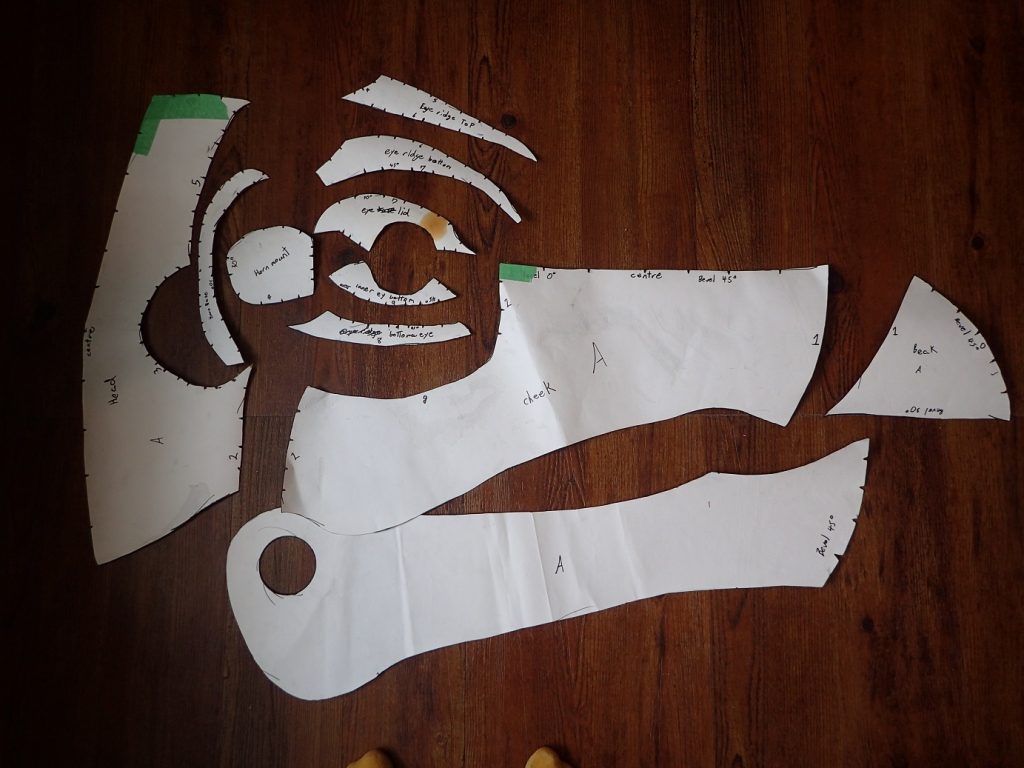
You’ll notice that some of my pattern pieces say “bevel 30°” or “bevel 45°.” That’s a reminder for me to cut the foam at an angle for turning sharp corners when it is glued together. The angles of the two pieces will sum together. So if ypu cut both sides of a seam at 45°, the resulting piece will have a 90° angle once glued together.
Assembly
Transfer the pattern, including tick marks to your foam. If your dragon is symmetrical, like mine, remember to flip the pieces over to make the opposite side. I used half-inch EVA flooring foam cut from a 4’x8′ roll. I was able to get two full dragon heads out of one roll.
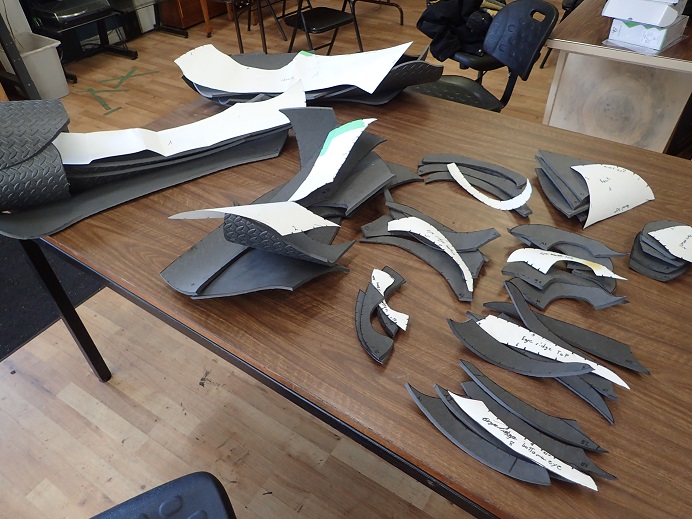
Once cut out you can start shaping the foam. Most heat guns on low heat will get the foam hot enough to stretch and shape. Ideally, you want to get the pieces shaped so that their seams meet up evenly without you having to stretch them or twist them much while you glue them. However, the foam should be flexible enough that you don’t have to get it perfect. Just make sure you’re happy with any tight corners, domes, and dishes before you start gluing. All of your work with a heat gun should be done outside or somewhere very well ventilated. The foam doesn’t smell bad but it does let off some gases that you really shouldn’t be breathing.
My preferred glue for working with EVA is Lepage Heavy Duty Contact Cement. I’ve been told that Barge brand contact cement is also excellent, but it isn’t widely available in the great white north, so I can’t speak to that. Contact cement is great because it has a really easy application and working time. You just slather it on both sides of the seam that you’re gluing together, wait ten minutes for the glue to dry, and then press the two sides together. Same warning as above about fumes. This isn’t something you want to be huffing all day.
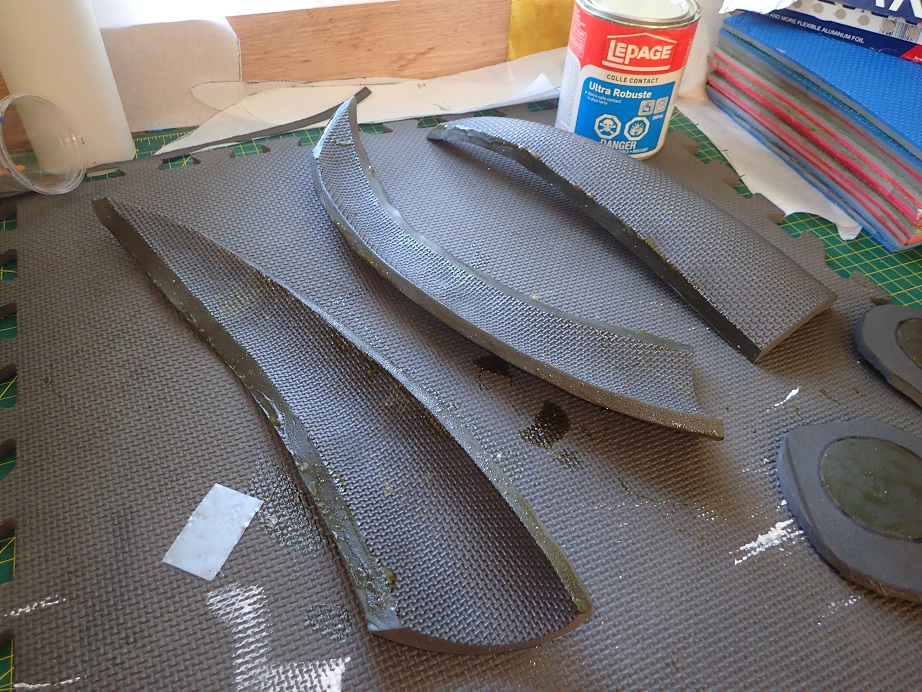
I prefer to start with the larger pieces and then work with the smaller ones, making sure they fit into the space where they belong as I go.
Decoration
Once you have the basic shape assembled, you can give your dragon a lot of personality pretty easily.
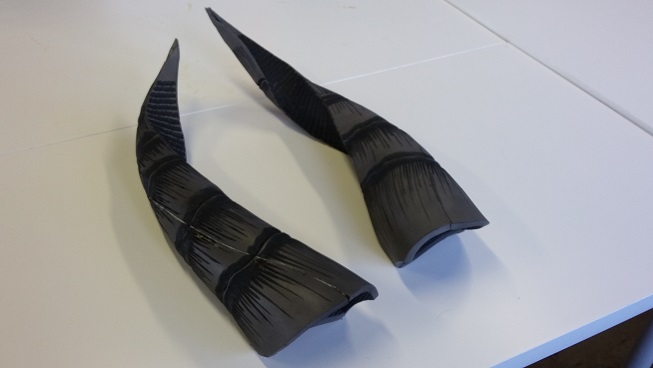
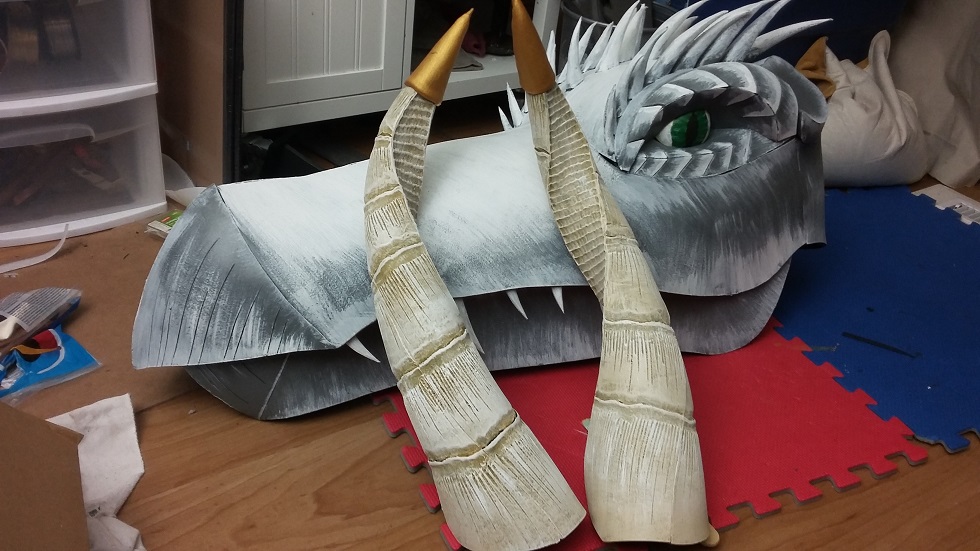
The first trick is to add texture. You can do this by drawing in ridges and scales using a soldering iron or dremmel tool as shown on the horn below.
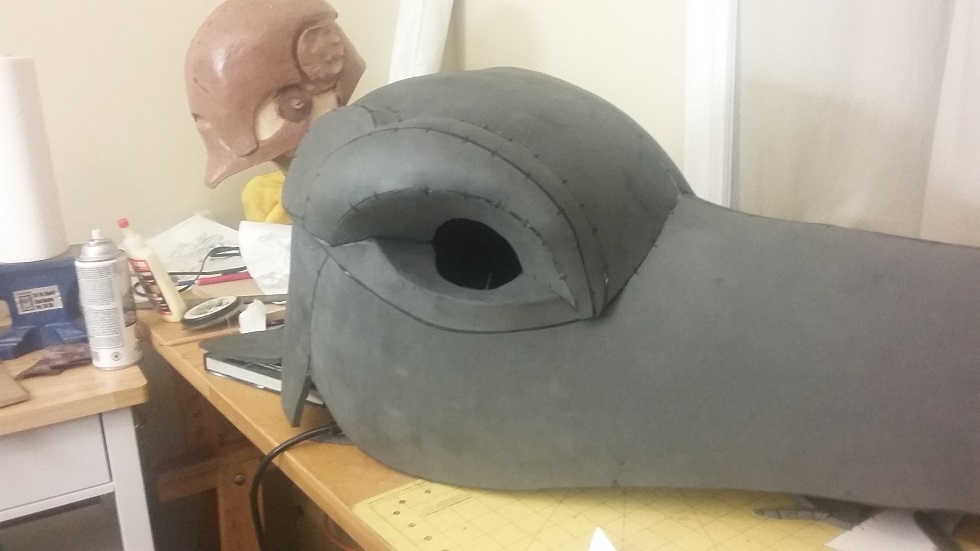
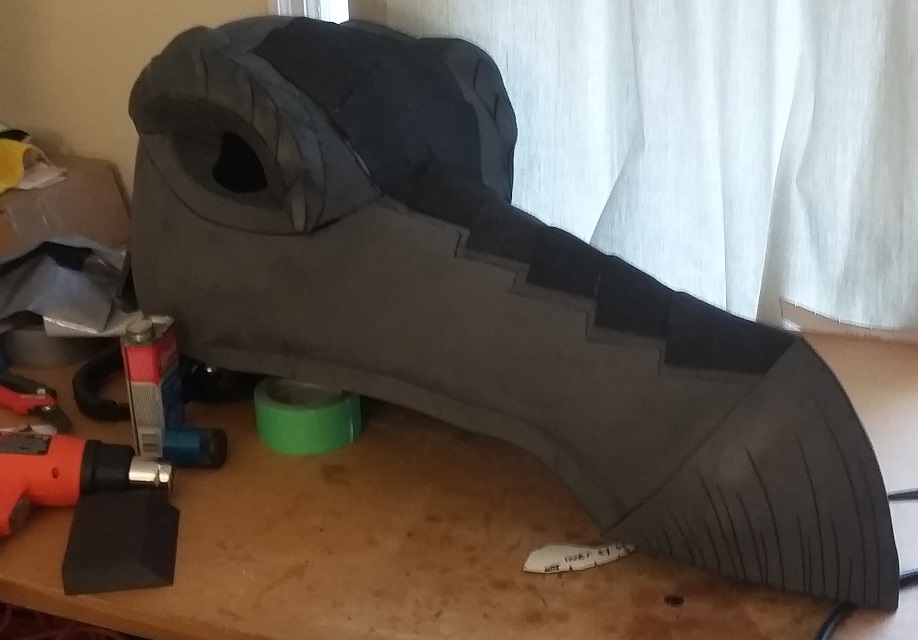
You can also cut into the foam a little ways with a knife and then hit it with a heat gun. That will give you little crevices. You can see that effect on the beak and eyebrow ridges of the dragon shown below.
You can also add scales and details with thinner craft foam. It’s the same material and you can work it in all the same ways as the flooring foam.
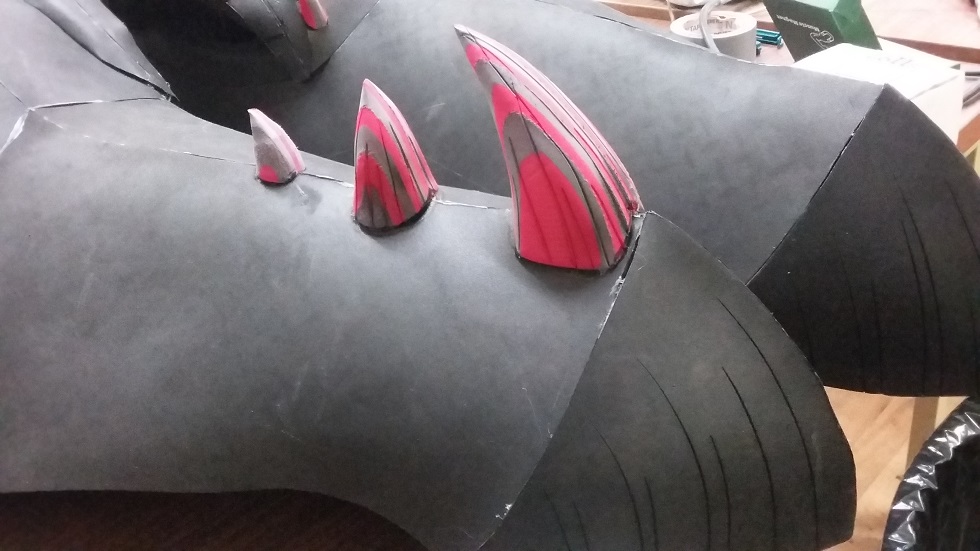
Another easy addition is spikes and horns. Smaller horns and spikes are easiest to make solid as shown below.
Painting
Before painting EVA you really want to seal it. It’s porous enough that it will soak up a ton of paint if you don’t. I had a lot of success by first hitting it with a heat gun and then throwing down a couple layers of watered-down white glue. You have to really let it dry before putting on any more paint. My base-coat of paint is usually spray paint that is a few shades darker than I imagine the final product being. Always do a test patch to make sure the paint will won’t react with the foam or sealant. If you don’t, you can get paint that stays tacky forever.
Once you’ve got a solid and even base-coat on, you can add a lot of depth and personality by adding highlights. I do this in a couple stages, first by wet-brushing on acrylic paint a couple shades lighter than the base coat near any ridges or edges. Then, repeating with lighter and lighter shades with less and less water, until I’m dry-brushing just the very tips of horns and teeth and sharp corners. Below are some heads at different stages of paintedness.
Horns
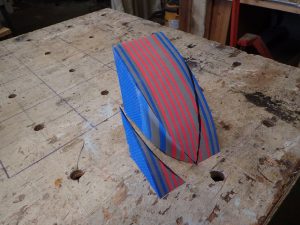
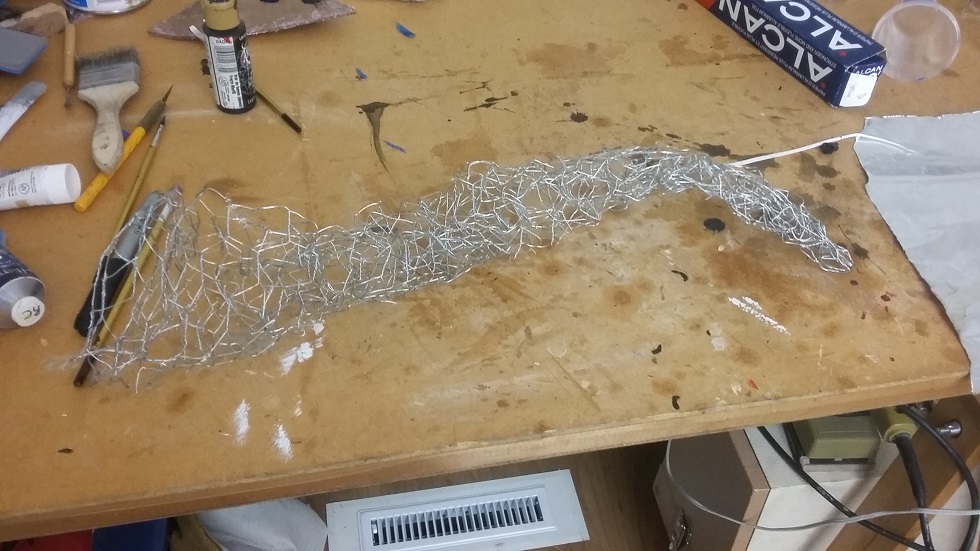
Making large horns follows much the same process as the rest of the heads: sculpt, pattern, cut, shape, glue, decorate, paint. The biggest difference is that it is much easier to use chicken wire as the base form than insulation foam. It’s easier to experiment with shapes and twists using the chicken wire. If you go this way, make sure you get the hexagon pattern chicken wire. The square pattern stuff isn’t as cooperative. Once you have a shape you’re happy with, cover it in tin foil to even out the surface, then wrap in duct tape. When marking your lines to cut along, try to follow the curve and twist of the horn and have at least three reasonably even sections that run the entire length.
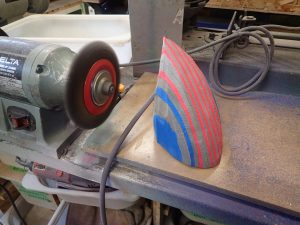
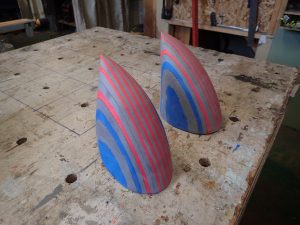
Pattern, cut and glue as with the head above. I recommend beveling the tips of each piece to help get a nice sharp point on the horn.
Horns work really well with burned in detail from a soldering iron to give them texture.
Paint and highlight as above I like to use colors that will stand out from the head but are reasonably related. Think of the relationship as something like skin-color to hair-color in humans.
Eyes
The easiest way I have found to make eyes is to get a pile of cheap plastic Christmas ornaments, cut them to size, paint them, and hot glue them into place. Thick acrylic paint works really well because you can use the natural brush stroke texture to mimic the texture of an iris.

Showing off
After only a hundred or so hours, you too could have a stack of giant foam dragon heads. Good luck! If you follow this process or use my pattern, I’d love to see what you create.


Hi Ryan. Love the dragons! I’m producing She Kills Monsters, Young Adventurer’s Edition at a high school in Oregon and will be crafting my own Tiamat. So my question is thus: Early on you mention using pink or blue insulation foam, but later you mention using EVA flooring foam. Are these two materials used for different aspects of the project, or are either one acceptable for building the structure of the puppet? Also, any specific advice you’d lend in the creation process? I plan on having my art team follow your templates. If you were geographically closer, I’d ask if I could rent them from you, they’re just that awesome.
Thanks!