For theatrical reasons, I needed to make a couple of gory severed arm props to be used as weapons in combat. They had to be strong enough to stand up in a sword-fight, light enough to swing around quickly and not injure anyone, and lifelike enough to be properly unsettling.
I started with the hands following a process I got from a Tested Video. Now, I love me some tested, but they have a way of making things look quick, cheap, and easy that are none of those things. I’m both surprised and happy to say that this turned out exactly as I hoped and required less skill and money than I expected.

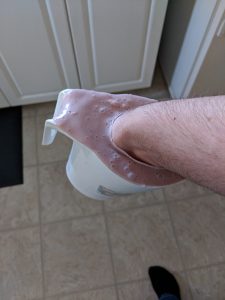 I made the mold by taking a cast my own hand in a milk jug using mint dental alginate. It worked brilliantly, capturing incredible detail extremely quickly.
For the American readership, a milk jug is a thing that holds bags of milk.
Canadians drink milk out of bags.
It’s very normal.
No, you’re weird.
The only challenge with the mold was getting the right mixture of alginate powder to water. It’s supposed to be measured by mass, but I don’t have a scale accurate enough to do it. I managed to estimate by volume and didn’t have a problem.
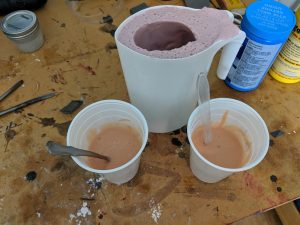
Unlike the folks at Tested, I needed a really strong Silicone for the hand. It would need to stand up to a lot of abuse. To that end, I used a platinum cure silicone: Dragon Skin 30 from Smooth-On. It was probably overkill, but I had some of it lying around from an old project.
I figured out how much silicone I needed by filling the mold with water and then pouring it out into a measuring cup. That saved me wasting what is a pretty expensive material.
I tinted it with the generic fleshtone that comes in the Silc Pig sampler pack. It worked pretty well but I have to say, a little goes a long way. I planned to add a little pigment at a time and sneak up on the color, but my first couple of drops overshot the color and opacity I was looking for. Even so, it looked pretty good in the end.
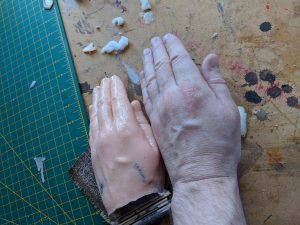 I don’t have a vacuum pump, so I couldn’t de-gas the silicone, and that would have definitely improved the end result. From up close, the surface has a lot of bubbles.
To attach the hand to the rest of the arm, I put a strip of strong woven fabric into the hand, protruding out from the wrist. I also made sure to soak the strip in the silicone mixture before putting it in the casting so that the whole strip was infused with the silicone. That made it stronger and less likely to pull out of the hand.
The part I worried about most with this was the painting of the hand. I’ve never done any detail work with an airbrush, nor have I ever tried to paint silicone.
I borrowed an airbrush and was pleasantly surprised that it worked exactly as described in the Tested video. Also, it dried slowly enough that it was very easy to wipe off when I made mistakes.
The end result was distressingly lifelike.
I made a silicone hand following the process from an @testedcom video and it worked great. #maker #theatre #props pic.twitter.com/xyDmjEukfV
— Ryan Consell (@StudentofWhim) April 24, 2018
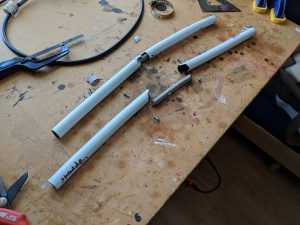
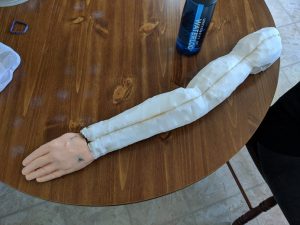
The rest of the arm was built up in layers. I needed a solid core that wouldn’t bend on me, then a softer exterior to grab onto, and an elbow so the arm would flop realistically.
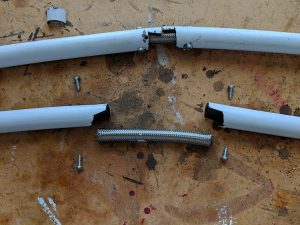
The for the core of the arm, I used some flexible PVC pipe. The elbow joint needed to be flexible, but tough enough to take a sword hit. For that I used some faucet connector hoses wrapped in braided steel.
I held the hose inside the pipe with wood screws. The joint itself just required a notch to be cut out on one side of each pipe so it would only bend one way.
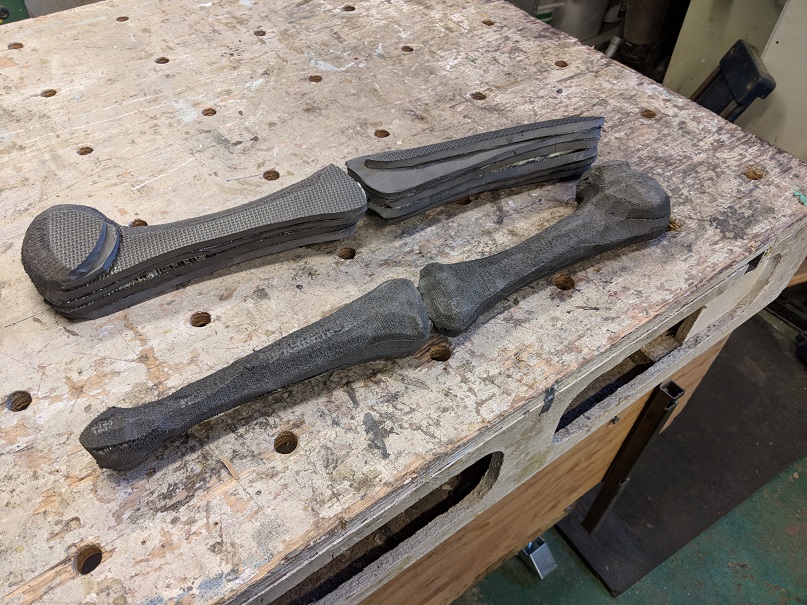
I initially planned on using upholstery foam for the entire bulk of the arm, but a quick experiment showed that it didn’t look like a real arm when you picked it up. Id didn’t have enough mass or internal structure. I’d compare it to watching someone drink from an empty coffee cup on stage.
To fix that, I added an unnecessarily accurate skeleton around the pipe made of EVA foam.
I cut it out from some floor mats left over from building Holden the Beholder and layered it up around the PVC pipe. I then carved it down using my favourite EVA removal device: a bench grinder with a wire wheel. It’s fast, messy, and unforgiving.
With the skeleton built, I could attach the hands.
I did that by slicing up through the wrist “bones” and sandwiching the strip of fabric between them. I held it in place by putting a few screws through the whole assembly. I used wood screws and then cut off the protruding sharp end with a dremmel cut-off disk.
The next layer was the upholstery foam. I cut a rough impression of the EVA bones into the foam, and then used contact cement to glue the whole assembly together.
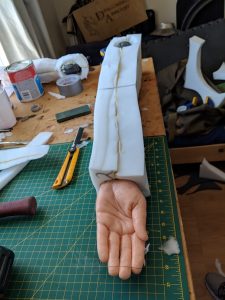
I carved the foam down with a box cutter that I sharpened every couple of slices. Foam cuts very nicely, but dulls a blade incredibly quickly. I’ll have a post on that in the near future.
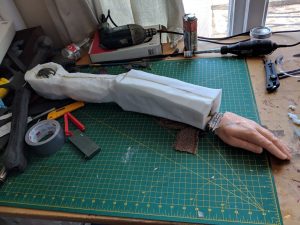
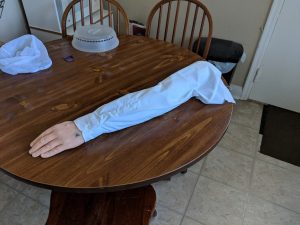
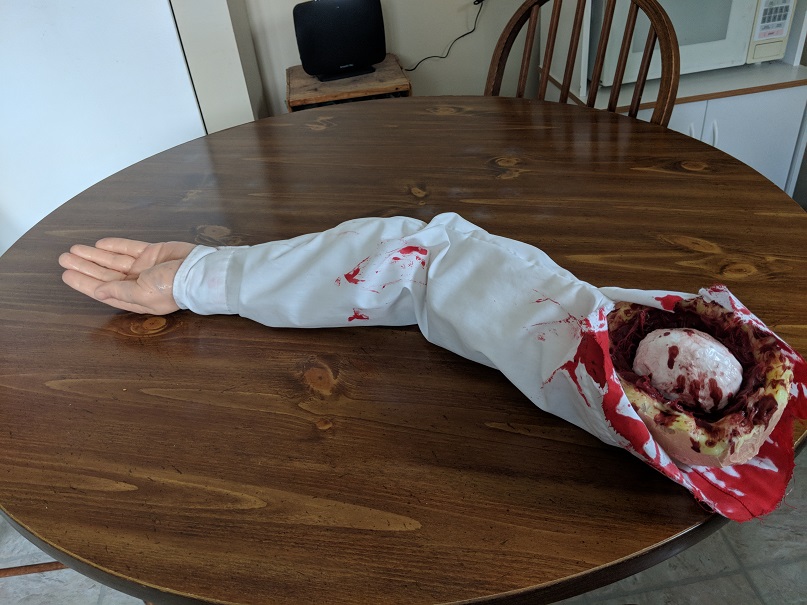
The final step was to add some gore to the shoulder. I again used the advice from the Tested Video, using clear caulking silicone tinted with Silc Pig pigment as a gory sculpting medium, adding a layer of fat and muscle, and adding a smooth white cap of cartilage for the head of the shoulder joint.
Finally, I added some blood spatter to the arm with a silicone/naptha mixture (again suggested by Tested) and bloodies up the sleeve with some watered-down acrylics.
Le voila:


